用 Google Vision API 將圖像高效轉換為文字的完整教學
BY PJ.
-2025 年 4 月 23 日
(最後更新於: 2025 年 6 月 18 日)
在日常工作中,如果只是偶爾將圖片轉成文字,使用 Google 翻譯 的相機功能即可快速處理。但若你面對的是大量掃描文件、報表或 PDF 檔案需要批次轉換為文字,這時候就推薦使用 Google Cloud Vision API,能有效完成 OCR(光學文字辨識)工作。
為什麼不直接用 PyPDF2 或 Adobe Acrobat?
雖然 PyPDF2 和 Adobe Acrobat 都能從 PDF 中提取文字,但它們各有局限:
- PyPDF2 僅能處理
內含可選取文字的 PDF(例如 Word 轉成 PDF 的檔案)。 - 若 PDF 是掃描檔(即內含圖片的 PDF),PyPDF2 完全無法辨識文字,因為它看不到任何「文字層」。
- Adobe Acrobat 有 OCR 功能,但圖像品質不佳時,
準確度有限。 - 使用 Google Vision API,效果更佳✅
以下是一個測試案例,原始 PDF 為一張報紙掃描圖:

透過 PyPDF2 處理:
import PyPDF2

with open('報紙.pdf', 'rb') as file:
    reader = PyPDF2.PdfReader(file)
    text = ''
    for page in reader.pages:
        text += page.extract_text()

print(text)
⬇️ 執行結果如下圖:

⚠️ 幾乎無法辨識,因報紙的字體較特殊。
使用 Google Cloud Vision API 處理:
⬇️ 執行結果如下圖:
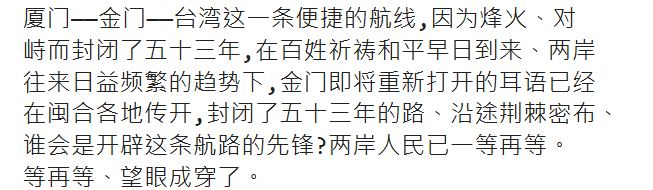
✅ Vision API 可準確辨識大多數內容。
Google Cloud Vision API 使用步驟
以下教學如何取得Google Cloud Vision API金鑰並運用
🔧 步驟 1:申請並設定 Google Cloud Vision API
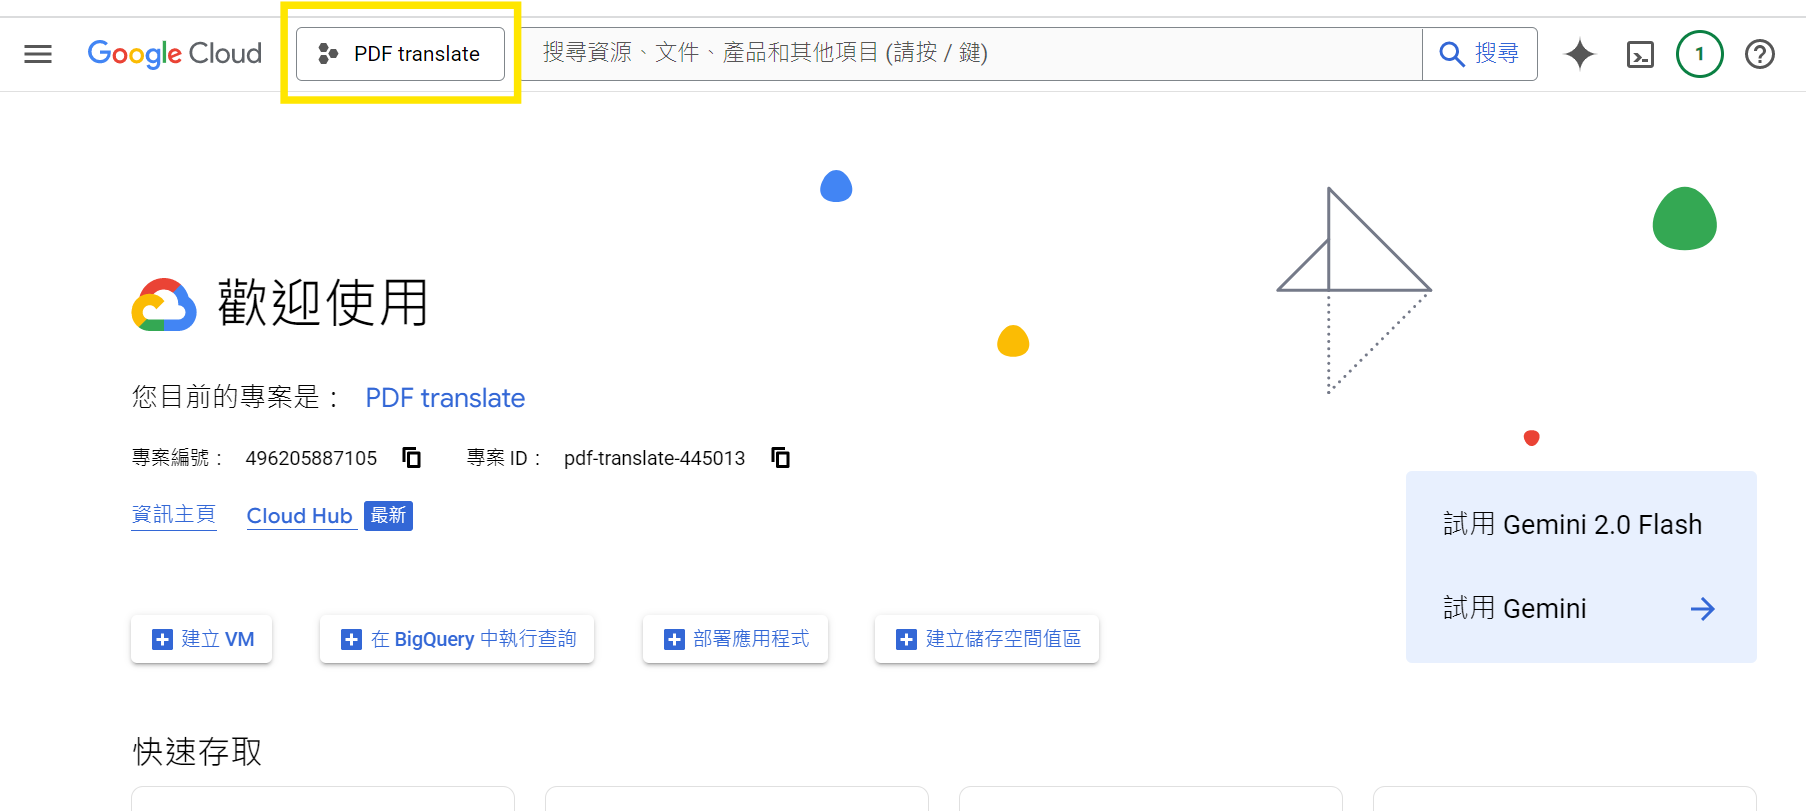
- 前往 Google Cloud Console
- 建立一個新專案(或使用現有專案)
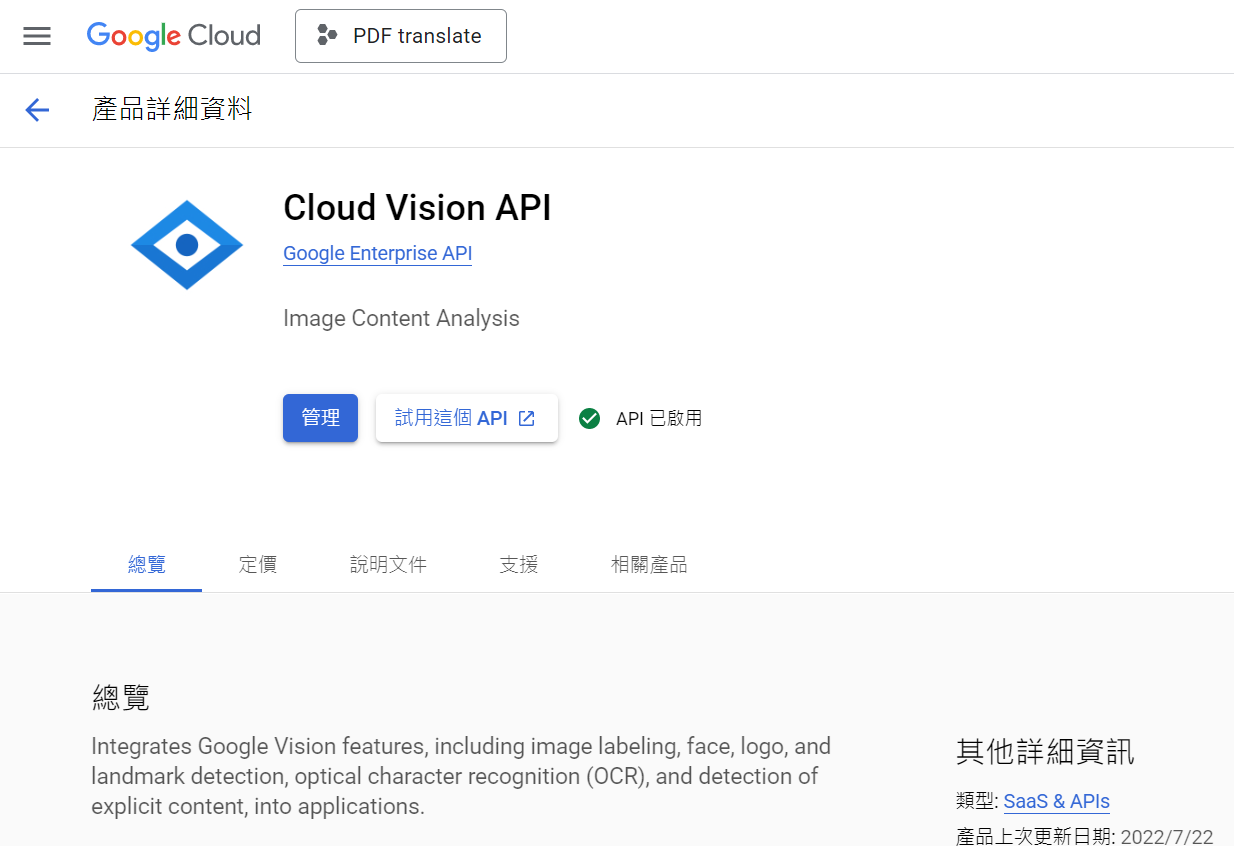
- 啟用「Vision API」
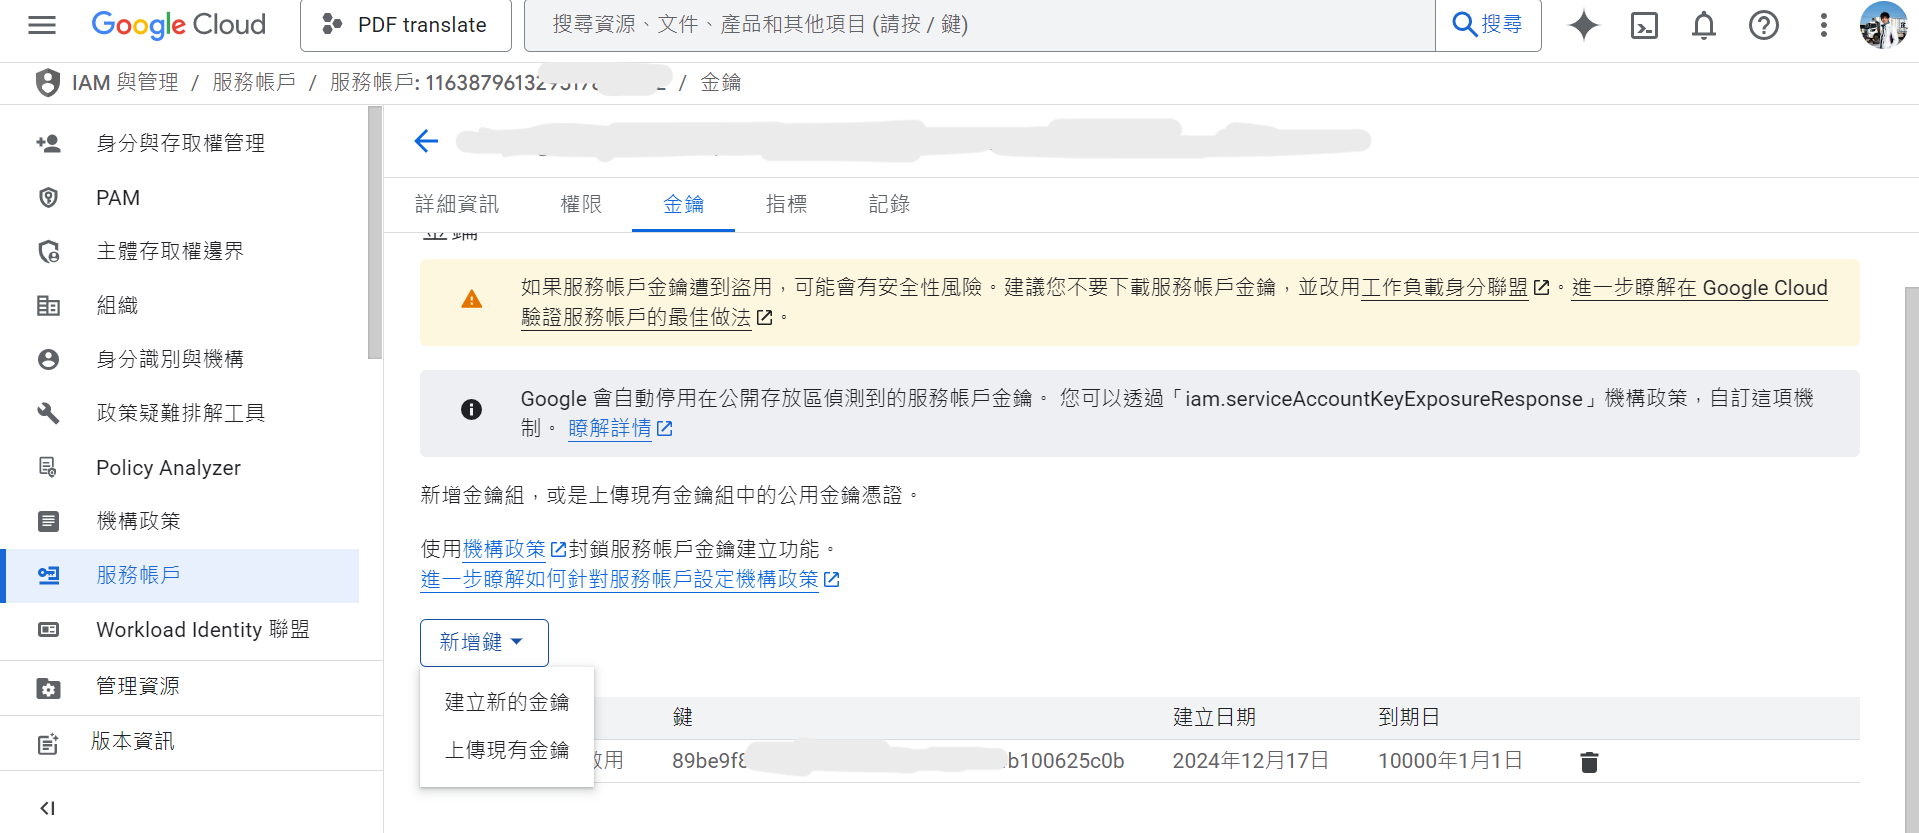
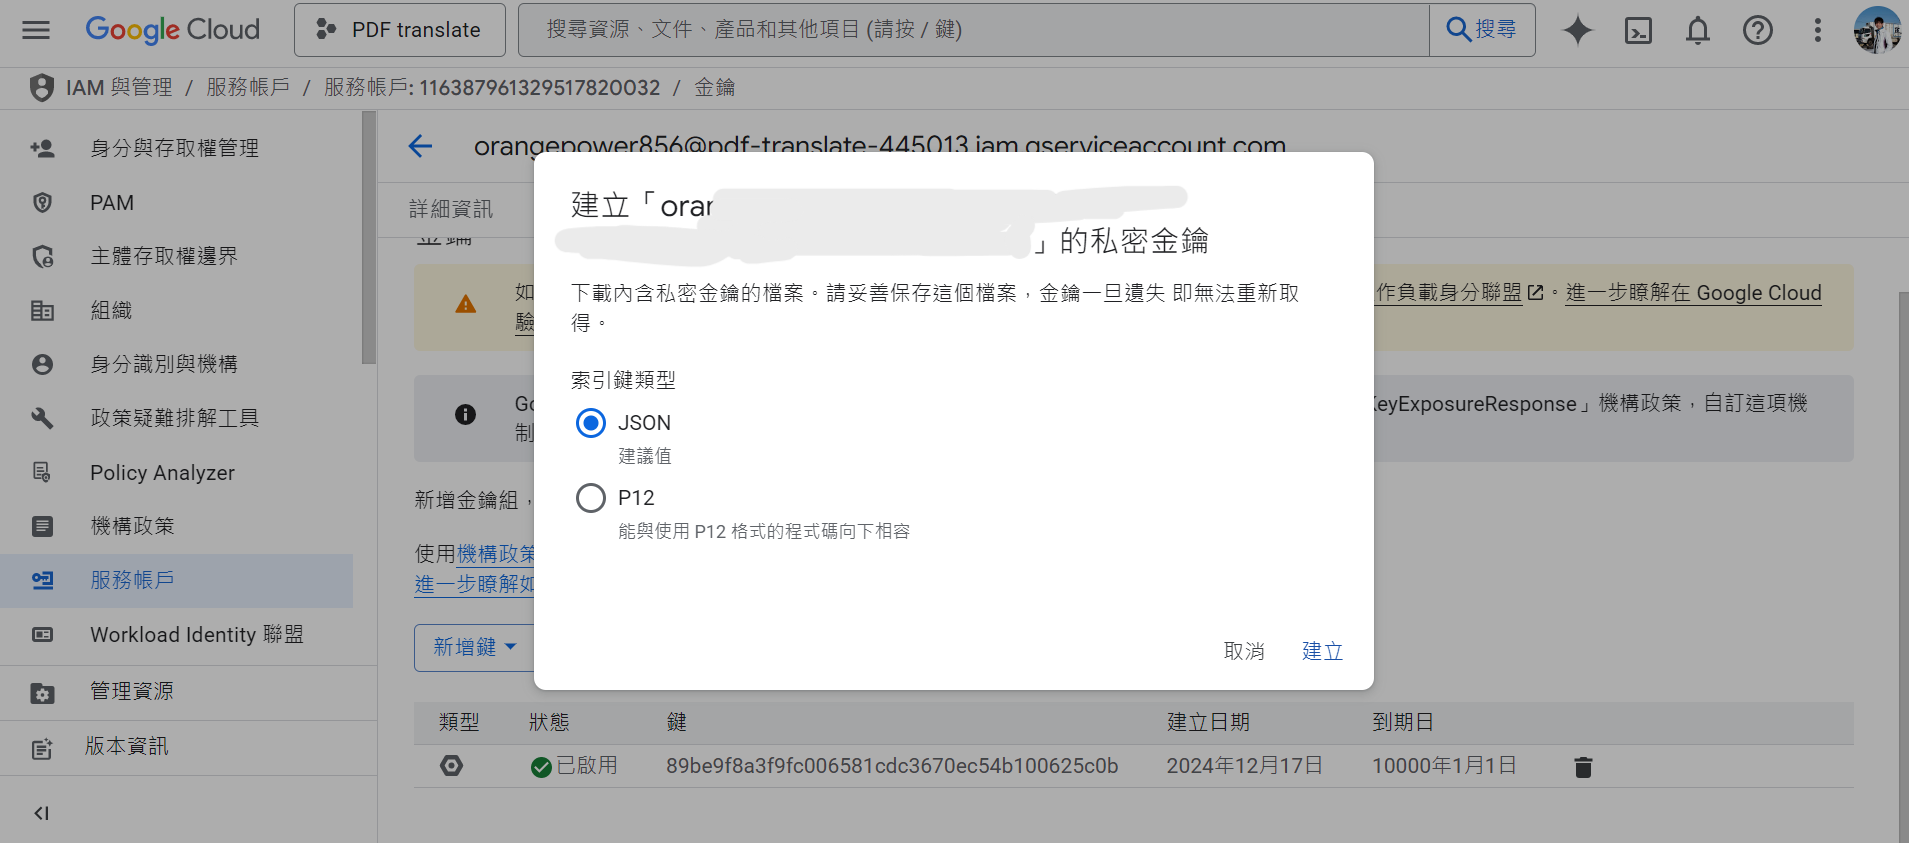
- 建立 API 金鑰:
導覽選單 ➝ API 和服務 ➝ 憑證 ➝ 服務帳戶 ➝ 選擇帳戶 ➝ 金鑰 ➝ 建立新金鑰 ➝ 選擇 JSON
系統會下載一份 credentials.json 憑證檔,後續程式會用到
🧰 步驟 2:安裝 Python 套件
pip install google-cloud-vision google-cloud-translate pymupdf
套件說明:
google-cloud-vision:文字辨識pymupdf(即fitz):將 PDF 每頁轉成圖片供 OCR 使用
📁 步驟 3:設定憑證為環境變數
import os

# 替換為你的 JSON 憑證路徑
os.environ["GOOGLE_APPLICATION_CREDENTIALS"] = r"C:\Users\your_name\credentials.json"
🖼 步驟 4:將 PDF 儲存為圖片
import fitz  # PyMuPDF
import os

pdf_path = "報紙.pdf"
output_folder = "output_images"
os.makedirs(output_folder, exist_ok=True)

pdf_document = fitz.open(pdf_path)

for page_number in range(len(pdf_document)):
    page = pdf_document[page_number]
    image = page.get_pixmap()
    image_path = os.path.join(output_folder, f"page_{page_number + 1}.png")
    image.save(image_path)
    print(f"已儲存圖片: {image_path}")

pdf_document.close()
🔍 步驟 5:Vision API OCR 函式
from google.cloud import vision

def detect_text(image_path):
    client = vision.ImageAnnotatorClient()

    with open(image_path, "rb") as image_file:
        content = image_file.read()

    image = vision.Image(content=content)
    response = client.text_detection(image=image)
    texts = response.text_annotations

    if texts:
        print(texts[0].description)
        return texts[0].description
    else:
        print("未偵測到文字")
        return ""
📄 步驟 6:逐張圖片辨識並儲存為文字檔
import os

text_folder = "output_texts"
os.makedirs(text_folder, exist_ok=True)

image_paths = [os.path.join(output_folder, file)
               for file in os.listdir(output_folder)
               if file.endswith(('.png', '.jpg', '.jpeg'))]

for image_path in image_paths:
    text = detect_text(image_path)

    base_name = os.path.splitext(os.path.basename(image_path))[0]
    txt_path = os.path.join(text_folder, f"{base_name}.txt")

    with open(txt_path, "w", encoding="utf-8") as f:
        f.write(text)
結論:何時選擇 Vision API?何時選擇 PyPDF2?
| 工具 | 優點 | 適用情境 |
|---|---|---|
| PyPDF2 | 快速、免 API | 純文字 PDF、格式乾淨 |
| Tesseract OCR | 開源免費 | 圖像文字處理 |
| Google Vision API | 高準確率、自動化 | 掃描 PDF、圖像內嵌文字、複雜排版 |
Google Vision API 每月提供 1000 次免費請求,對大部分使用者來說已綽綽有餘。
這篇教學示範 如何將 PDF 文件轉換為圖片,並使用 Google Vision API 執行批次 OCR 辨識。當你需要大量辨識圖檔文字時,這項技巧能大幅提升你的工作流程。
YOU MAY ALSO LIKE...


#OCR #PDF轉文字 #文字辨識 #GoogleVisionAPI #Python自動化 #Python教學 #掃描檔處理 #圖片轉文字 #API串接